
Auto Attendant
What is the Auto Attendant?
Auto Attendants are used to provide callers with a friendly recorded company greeting and dialing menu options. They can route calls to:
- Employees within your company
- Specific groups of employees
- Voicemail
- Other, outside numbers.
Each Auto Attendant has three modes:
- Business hours
- After hours
- Holiday closures
To route callers to a second "tier" or branch of options, you need to set up a submenu on your system for:
- Options for multiple locations
- Options in multiple languages
- Sales or support for multiple product/service lines.
To route calls based on the time of day (i.e., after hours versus during business hours), you must configure an Auto Attendant schedule. You can also configure a company holiday schedule to identify the dates of holidays your company recognizes. On designated holidays, custom-recorded greetings and menu dialing options are played to callers. To run the same greeting at all times of the day, every day, you don't need to create or assign a schedule to your Auto Attendant.
Customize Auto Attendant now >
Step 1: Set your business and holiday hours
To set your business operating hours, first click on the "Business and Holiday Hours" link under "Additional Service Settings" on the admin dashboard. Then go to the "Business Hours" tab in the business and holiday hours library to edit an existing schedule or create a new one.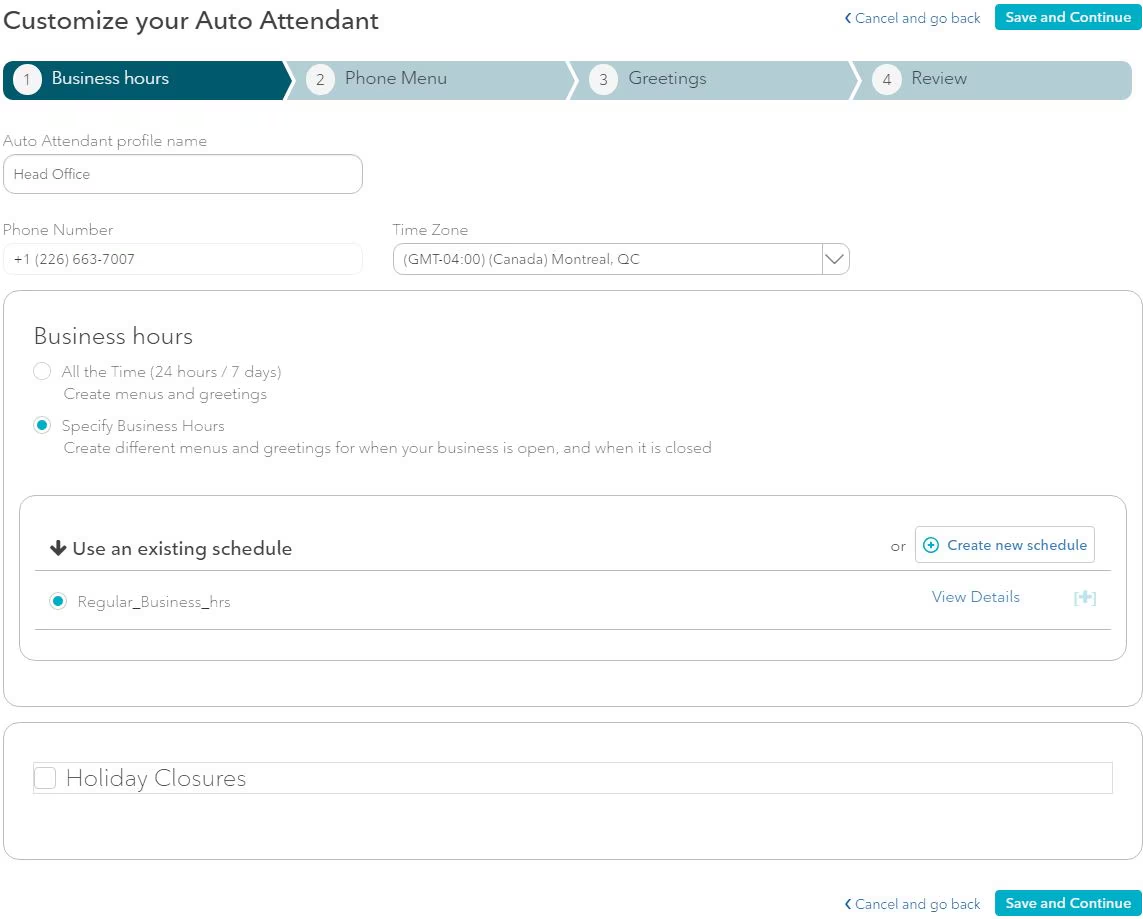
When you create a schedule, first give it a name, such as the business's location or business
division's name. Next, use the drop-down menus to select your opening and closing hours. If your
office is closed on a given day of the week, simply check the box beside "Closed" for that day.
If your business hours are consistent for all or most days of the week, you can use the "Apply to all
days" option to expedite the process and then make further changes if there are days with special
hours.
Holiday scheduling
To create a holiday schedule for the Auto Attendant, check the "Holiday Schedules" box. Next, click
"Create a New Schedule". Enter each holiday or event name in the fields provided. Select the start
and end dates and times, and indicate whether or not it is an annually recurring holiday.
Click on "Next" to move to the next Auto Attendant feature.
Step 2: Set up your phone menu.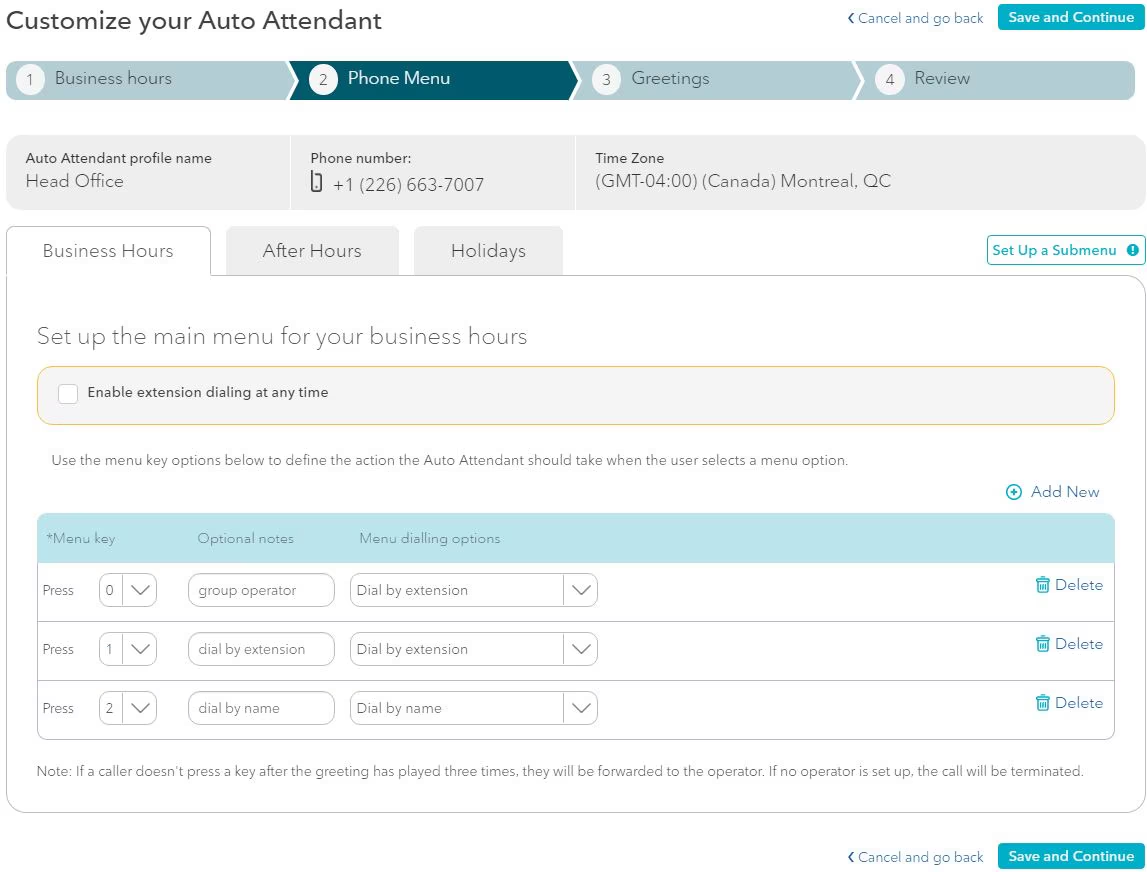
Determine the dialing menu options that will be presented to your callers. Set up options 0 – 9, pound
(#), and star (*) to present callers with different options from which to select.
- Click the "Add New" link.
- Select the desired option key from the drop-down menu.
- Enter a brief description of the call routing activity, such as "Sales department" or "John's cell".
- Determine how the call will be handled using the drop-down menu.
- Select the phone number to associate with this auto-response, such as one for an individual or a Hunt Group.
Step 3: Record greetings
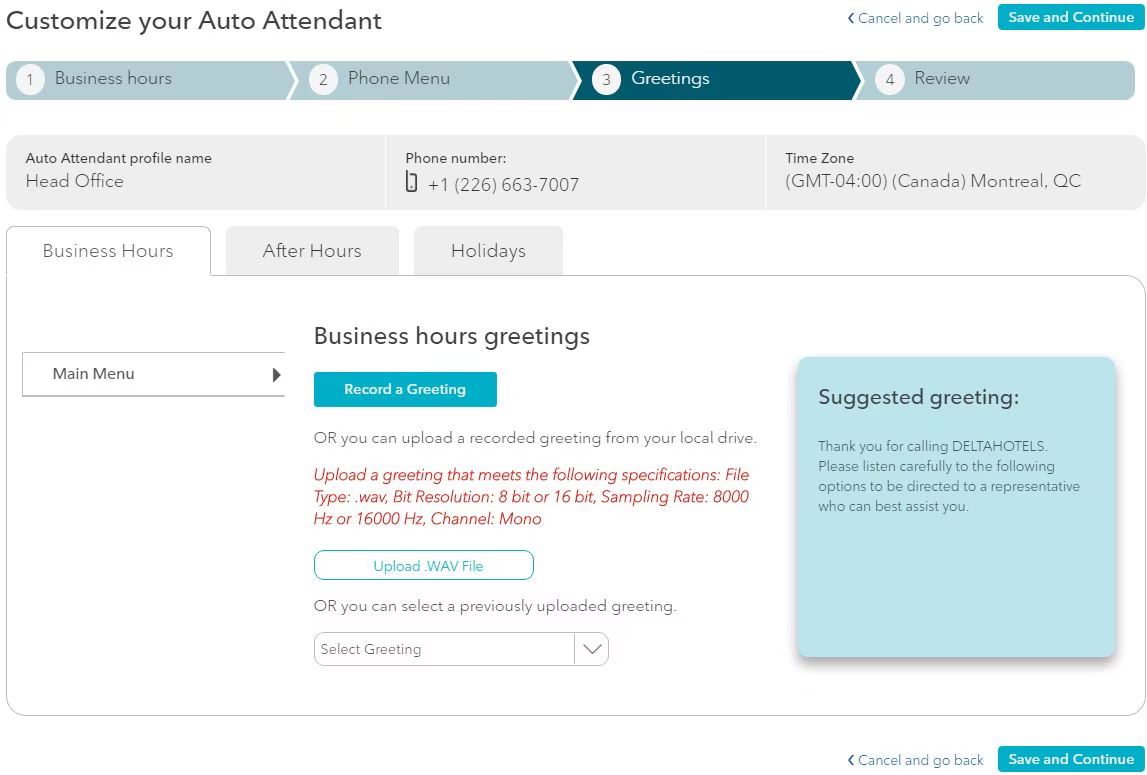
You can record a new greeting directly to Rogers Unison using the microphone on your computer, upload a new greeting, or select a previously uploaded greeting from your greeting library.
To record a new greeting:
- Enter the name of the greeting (e.g., "After hours greeting").
- Click "Record". You can play back your greeting once you've recorded it to ensure you are satisfied with it.
- Click "Save".
To upload a greeting:
- Enter the name of the greeting.
- Click "Upload File", select the file from your computer, and click "Open".
To select a previously uploaded greeting:
- Enter the name of the greeting.
- Using the drop-down menu, select from the greetings that you have previously uploaded.
Step 4: Review and activate your service
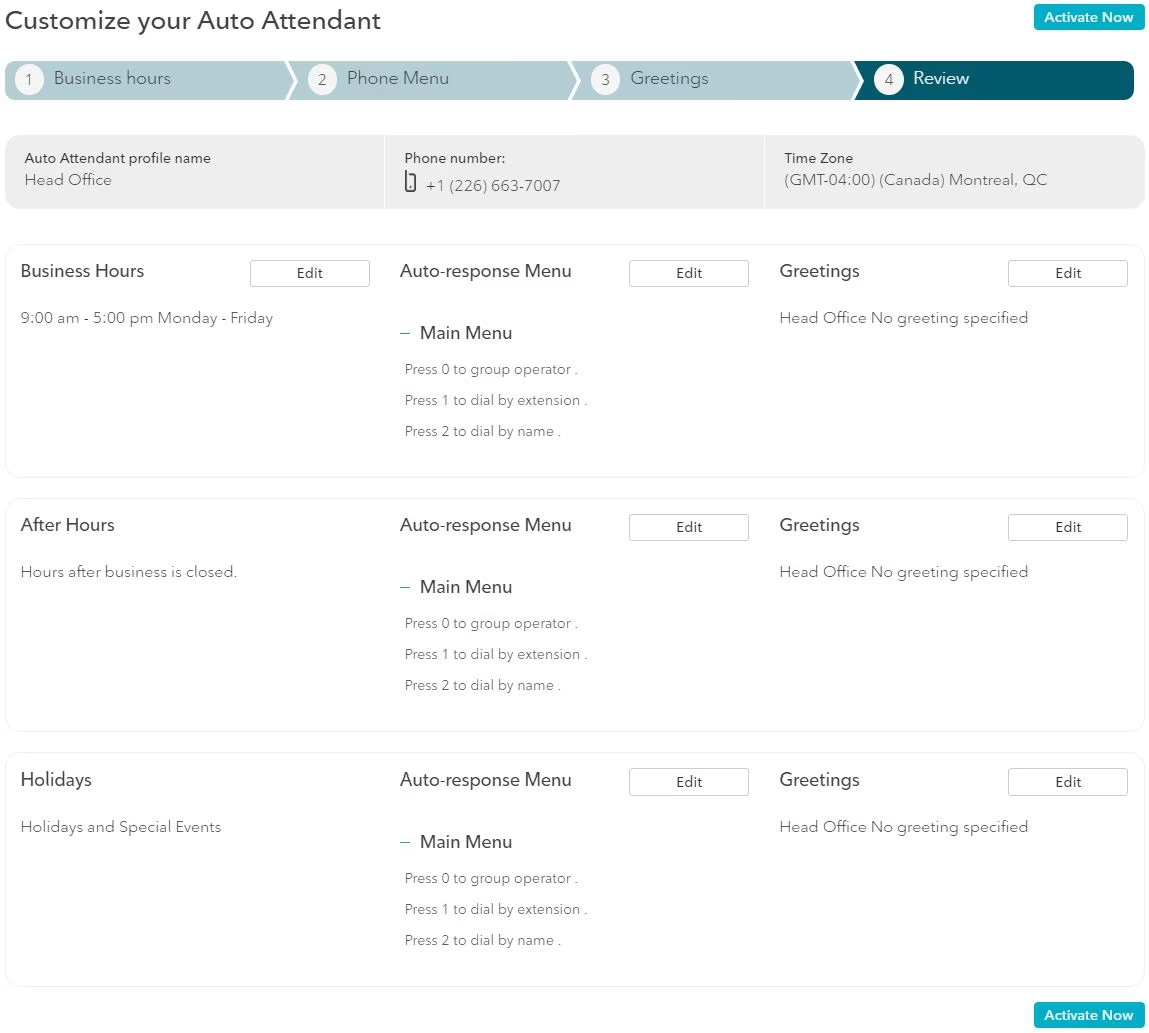
- Review the selections you've made for your Auto Attendant.
- Click "Edit" next to any section you'd like to modify.
- To save these settings and activate the Auto Attendant, click "Activate".
- Lastly, dial in to the Auto Attendant to verify that it's working as you want it to.
That's it! You've configured your Auto Attendant.
Submenus
Many businesses have multiple locations, have several departments or offer a wide range of spoken languages,
products and services. Creating submenus allows a second tier of menu options, ensuring that your callers
are routed effectively.
To create a submenu, click on the "Customize" button on the Auto Attendant home page. Next, click on the
"Save & Next" button once you have created an Auto Attendant and set up business hours. Find the "Create
a Submenu" buttons on the right hand side of the page and do the following:
- Create a submenu name.
- Add and set the menu keys, dialing options and caller prompts you want callers to hear.
- When you are satisfied with your Submenu options, click on "Save".